The role of 192.168.3.1 in your wireless network
Your wireless router uses a set of two IP addresses to establish your network. The public IP is what your ISP assigns and it serves as the postal address of the network – sites and services deliver data packages you request from the Internet to it. 192.168.3.1 is the default IP address your router uses to connect the internet-enabled devices in your network – laptops, tablets, printers, even smart devices like TVs and fridges. This default IP address is also called the default gateway to access your router’s admin panel where you can customize and optimize your home or office WiFi.
Get Full Control of your Network at the Router Login Page 192.168.3.1
To change your network’s Service Set Identifier, set a password and even change the default private IP your router uses from 192.168.3.1 to something else you need to first access your network’s admin panel. You can do that by using your current private IP 192.168.3.1. Just connect to your WiFi and open a browser of your choice. Type 192.168.3.1 in the browser’s address bar and then fill in the default username and password found at the back of the device. Knowing the default credentials like ‘admin’ or ‘root’ is crucial to log in. This is part of the router login process to access the admin panel. After entering the IP address you will be directed to the router login page. You can also find them on the manufacturer’s website or the router’s user manual.
Modify your router’s private IP address
You can change your router’s private IP from 192.168.3.1 to something else or from what it is to 192.168.3.1. Since the private IP is for your network only, no one can stop you from doing that. While logged into the admin panel, go to the Network settings. In that menu you will see a section called either IPv4 or Local IP address where you can put the private IP you want to use from now on. Save the changes and next time you want to log into the admin panel you will have to use the new address.
If you encounter issues, you can restore the router to its factory settings and follow the user manual for reconfiguration.
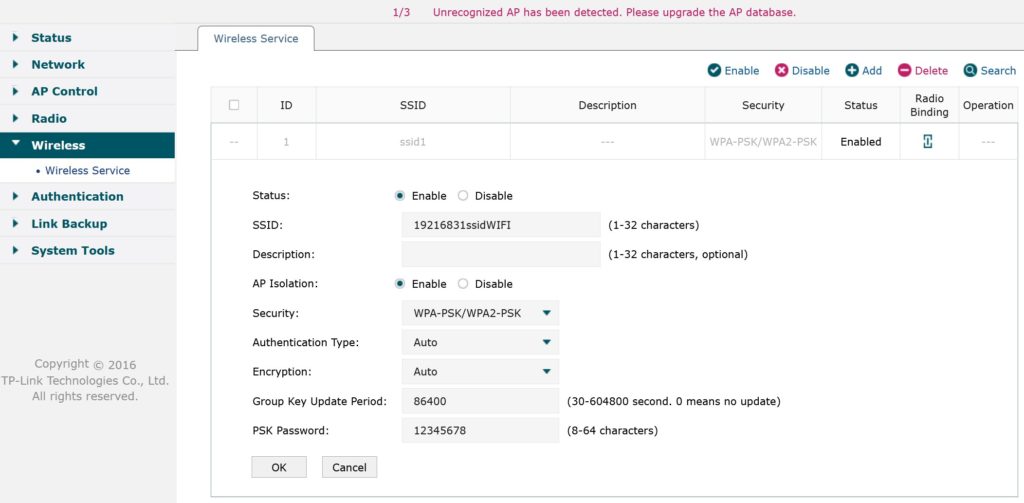
Changing your WiFi Name at 192.168.3.1
The admin menu at 192.168.3.1 gives you full control over your network so you can customize it to your liking and personal taste. That includes changing the name of the network itself. The Service Set Identifier (SSID) field which is the name your network uses to stand out from other networks in range is in the Wireless Settings menu. Usually it’s the brand and model of your router by default but your ISP might have changed it when they set up your network. You can put any name you want. Just remember to save the changes at the end.
Changing your WiFi Password at 192.168.3.1
To make sure that no one except you and the people that you authorize has access to your wireless network, you can change the WiFi password that needs to be used before you can sign onto your WiFi. Changing the WiFi password also helps secure the Wi-Fi connection. That is highly recommended for security reasons as well because being logged onto your router’s WiFi is the first step to gaining access to the admin panel at 192.168.3.1. To set up a strong password for your wireless connection, look for the password field under SSID in the Wireless Settings tab. Save the changes and try reconnecting to the wireless network to see if everything works as expected.
Troubleshooting potential issues with 192.168.3.1
If you try to enter the admin menu at 192.168.3.1 but you get a No Connection error, you should check for several things:
- Is your router turned on?
- Are you connected to the right router’s Wi-Fi network?
Different routers may have different troubleshooting steps, as in different parts of the world you might have so many manufacturers and models. You can also try connecting to the router directly via an Ethernet cable (LAN) or restarting the router – which is easy. It would be a good idea to make sure that the LAN cable connection is in order as well. If all else fails, contact your Internet Service Provider, so that they can check if there is a problem with your Wi-Fi connection on their end.