The private IP address 192.168.100.1 is a default gateway used by routers, and this IP address is only accessible from within the local network (your LAN). That’s on purpose – to keep your network secure. Private IP addresses like this are what you need to use to get to the router settings and manage all those devices hooked up to your network.
To access your Router’s Admin Panel you can enter 192.168.100.1 in your browser address bar or Login at:
These days, there are loads of different manufacturers out there, all using different default IP addresses and subnet masks. Huawei in particular use 192.168.100.1 as the default IP and 255.255.255.0 as the subnet mask. And you’ll even see this same address being used by modem brands like TP-Link, NetGear, Arris, Zyxel and Motorola. You can use this address to get into your device’s admin panel – as long as you know the login credentials.
A bunch of routers from NetGear, TP-Link, Zyxel and Huawei use this address, and to get to their management interface, you just need to open your web browser and type http://192.168.100.1/ into the address bar. You’ll then be taken to the login page and you’ll need to put in your username and password (default ones are usually on the box or online).
Some of these routers use telecomadmin and admintelecom as the default username and password, while others use root and admin. And some are just the usual admin:admin or admin:password combo. If you’ve used the router before, you might need to use something different. If you can’t get to the login page, its probably worth checking the default gateway address – or try using another address like 192.168.1.1 or 192.168.0.1. (and make double sure you’ve got the address right – 192.168.l00.1 is a pretty common typo that many people type in the address bar)
In short, and as adviced by our team, you need to plug your computer into the LAN1 socket with an Ethernet cable for a stable connection. And when you’re setting up your router, make sure to put in the correct address in the TCP/IPv4 settings. And if you can’t get to your router, its probably worth trying to access the settings manually.
Now – a bit of background to all this. 192.168.100.1 uses something called Network Address Translation (NAT) to map a public IP to multiple private ones. It will assign a private IP to every device on the network (smartphone, laptop, TV etc) and you can access the router settings from any device as long as you have the login credentials (you can try the default login and the default password being the default credentials).
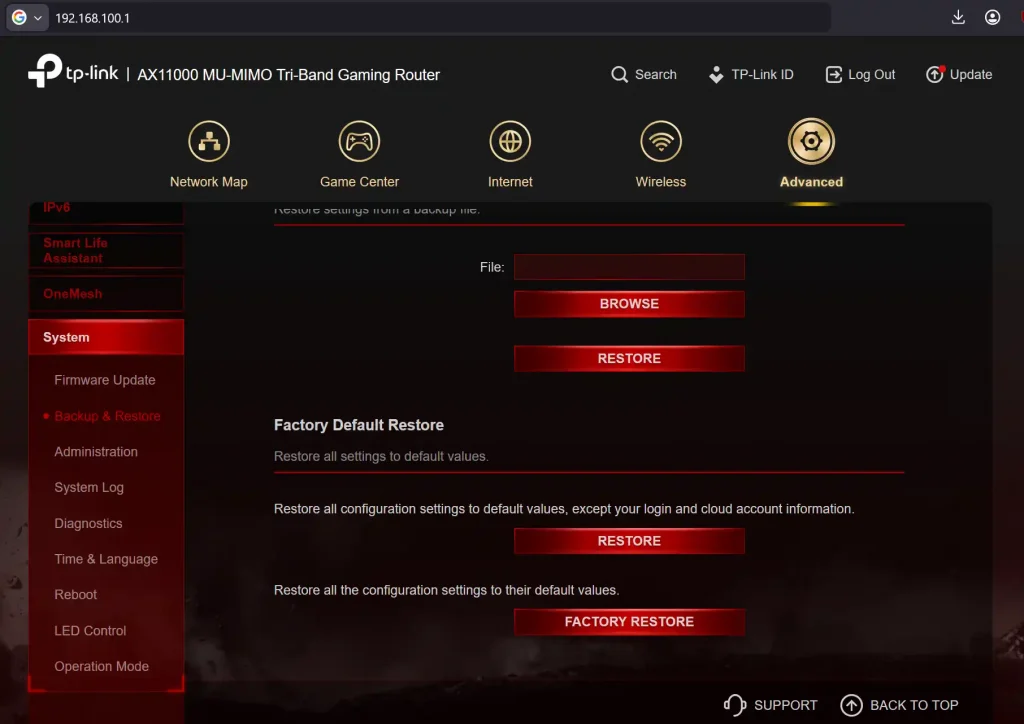
Before you make any changes to the settings, take down what they are – or reset the router to its default settings if you need to.
What to do if your 192.168.100.1 login user and password do not work?
If you’ve lost or forgotten your login details, you can do a factory reset by pushing a needle or paper clip into the reset button for 15-30 seconds. And then you’ll need to use the default login credentials to get back into the management page after that factory reset.
If you have loads of routers with the same IP, you might run into problems when trying to access the login page. Try setting up static IP addresses for all your routers so they don’t conflict.
Setting up 192.168.100.1 on your wireless network
To get your own router confiured using 192.168.100.1, get into the wireless tab or wireless settings through the router management interface. You’ll find this in the WLAN tab in the admin panel, where you can change settings for both your 2.4 GHz and 5 GHz bands separately. From the WLAN Configuration, you can tweak settings for your network or get to other basic settings related to the wireless network. For example “SSID Name” lets you name your Wi-Fi network – that’s the name you see when you’re scanning for available Wi-Fi networks. You can give your network a unique name here, and also change the Wi-Fi password to make your network more secure – which is always a good idea. It’s worth choosing a name that’s not easily guessable.
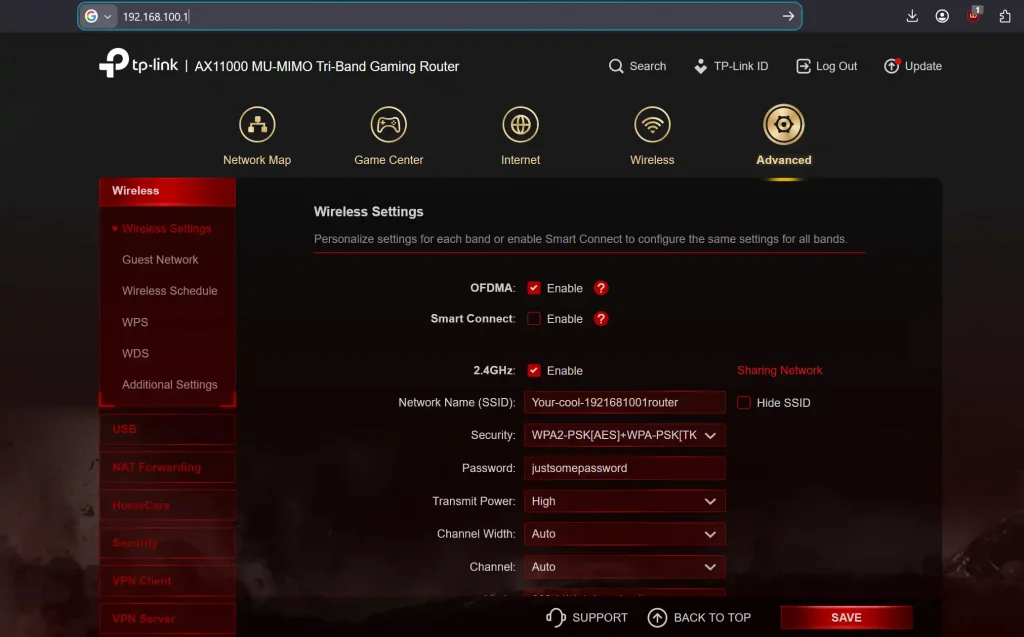
Choose the Authentication Mode – basically the security settings for your network. For most people, WPA2-PSK with AES is the way to go – it’s the best of both worlds. Now enter your Wi-Fi password into the WPA2 Pre-Shared Key field – this is what lets devices connect to your network. Make this password strong – use a mix of upper and lowercase letters, numbers, and symbols to keep the hackers out.
Once you’ve made any changes to your network settings, whether that’s Wi-Fi, wireless settings, network firewall settings or whatever else you need to tweak at 192.168.100.1, hit apply to get them to take effect.
Note – if you want to change your Wi-Fi SSID and password, you can also do it directly on your router – just go to 192.168.100.1 and log into the admin interface.